EdAlive Central (Schools) - School Administrator Functions
The Role of a School Administrator
Each School starts with one designated School Administrator. This first School Administrator can assign Administrator status to any number of the Teachers at the School.
The role of an Administrator is to perform bulk management tasks for the School and to ensure the privacy of the Students by limiting each Teacher’s access to the Classes and Students they are responsible for.
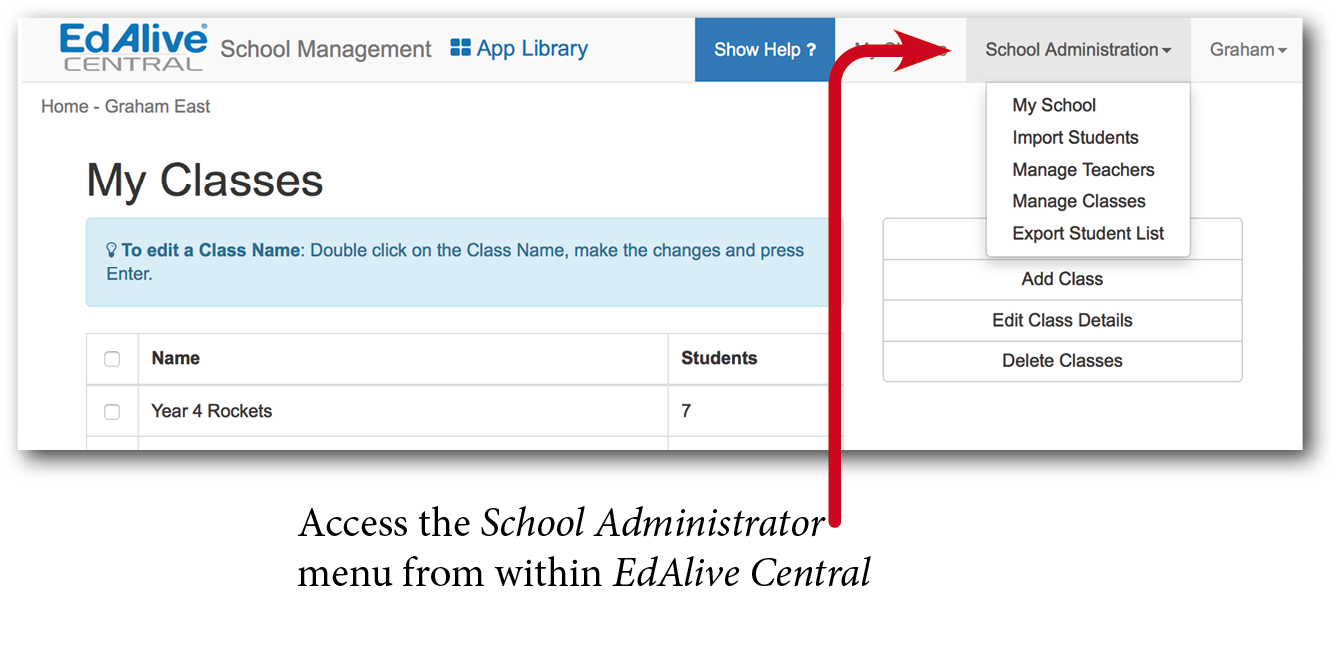
To access the School Administrator functionality you must be a designated School Administrator and be signed in to EdAlive Central.
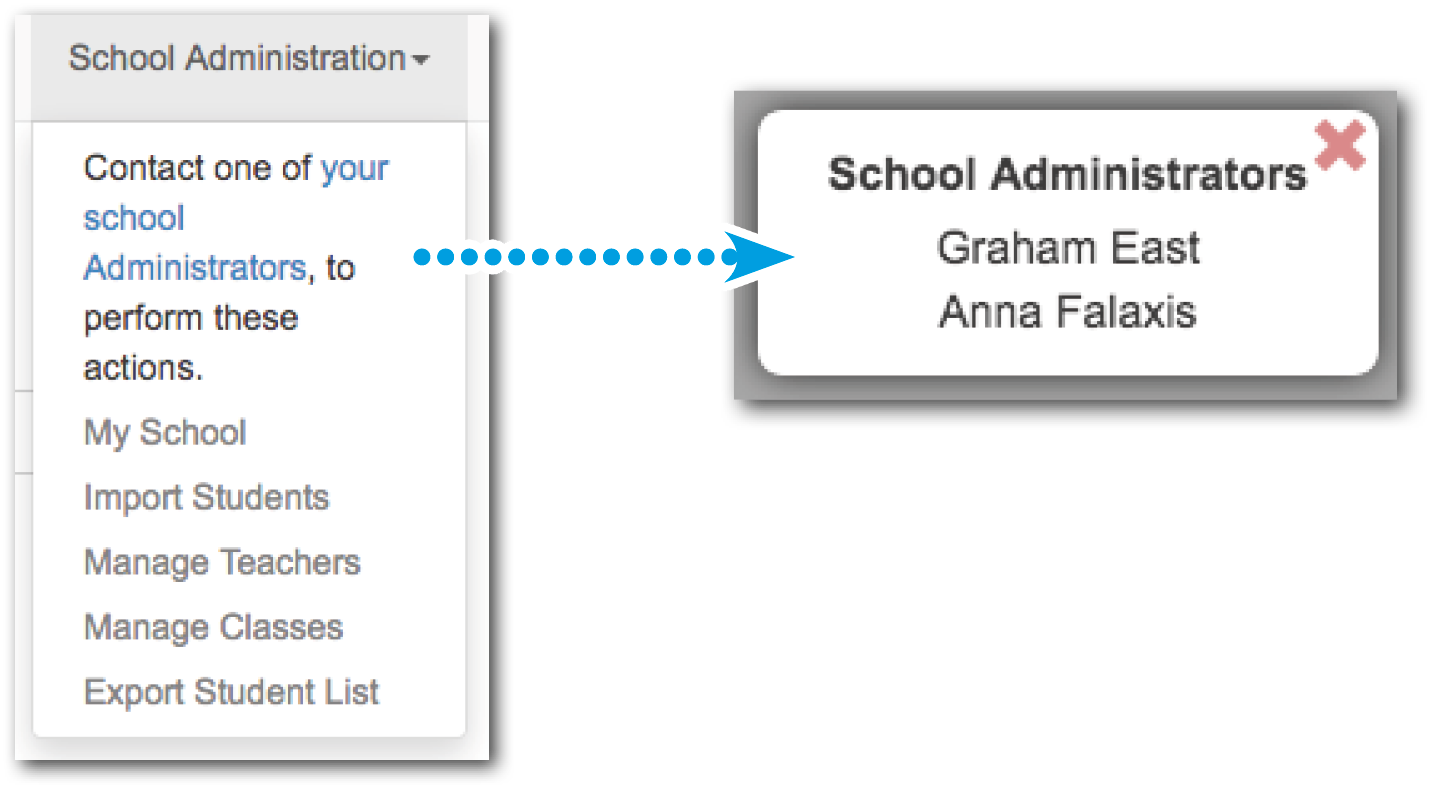
Who are your School Administrators?
If you are not one of the School Administrators you can access the School Administrator menu and the person or persons currently designated as School Administrators will be displayed. You will need to contact any one of them to have School Administration tasks performed.
Multiple School Administrators
The EdAlive Central system includes the flexibility to allow for any number of Teachers to be added to the School’s list of authorised School Administrators.
- When a teacher registers a new School in EdAlive Central, that teacher will automatically become the first Teacher on the list of School Administrators.
- All School Administrators have equal privileges.
- Any Teacher added to the list of School Administrators will be able to perform any and all of the School Administration tasks including adding/removing other Teachers from the list of School Administrators.
Privacy and Security with Multiple Administrators
It is important to remember that all Teachers on the School Administrators list have FULL ACCESS to the entire list of Classes, Teachers and Students at the School – including Student data and other reports.
 Typically these additional functions touch on matters of student privacy and the security of Student and Teacher data. It is the responsibility of the school to ensure that care is taken to accord with the school policy with regard to these issues.
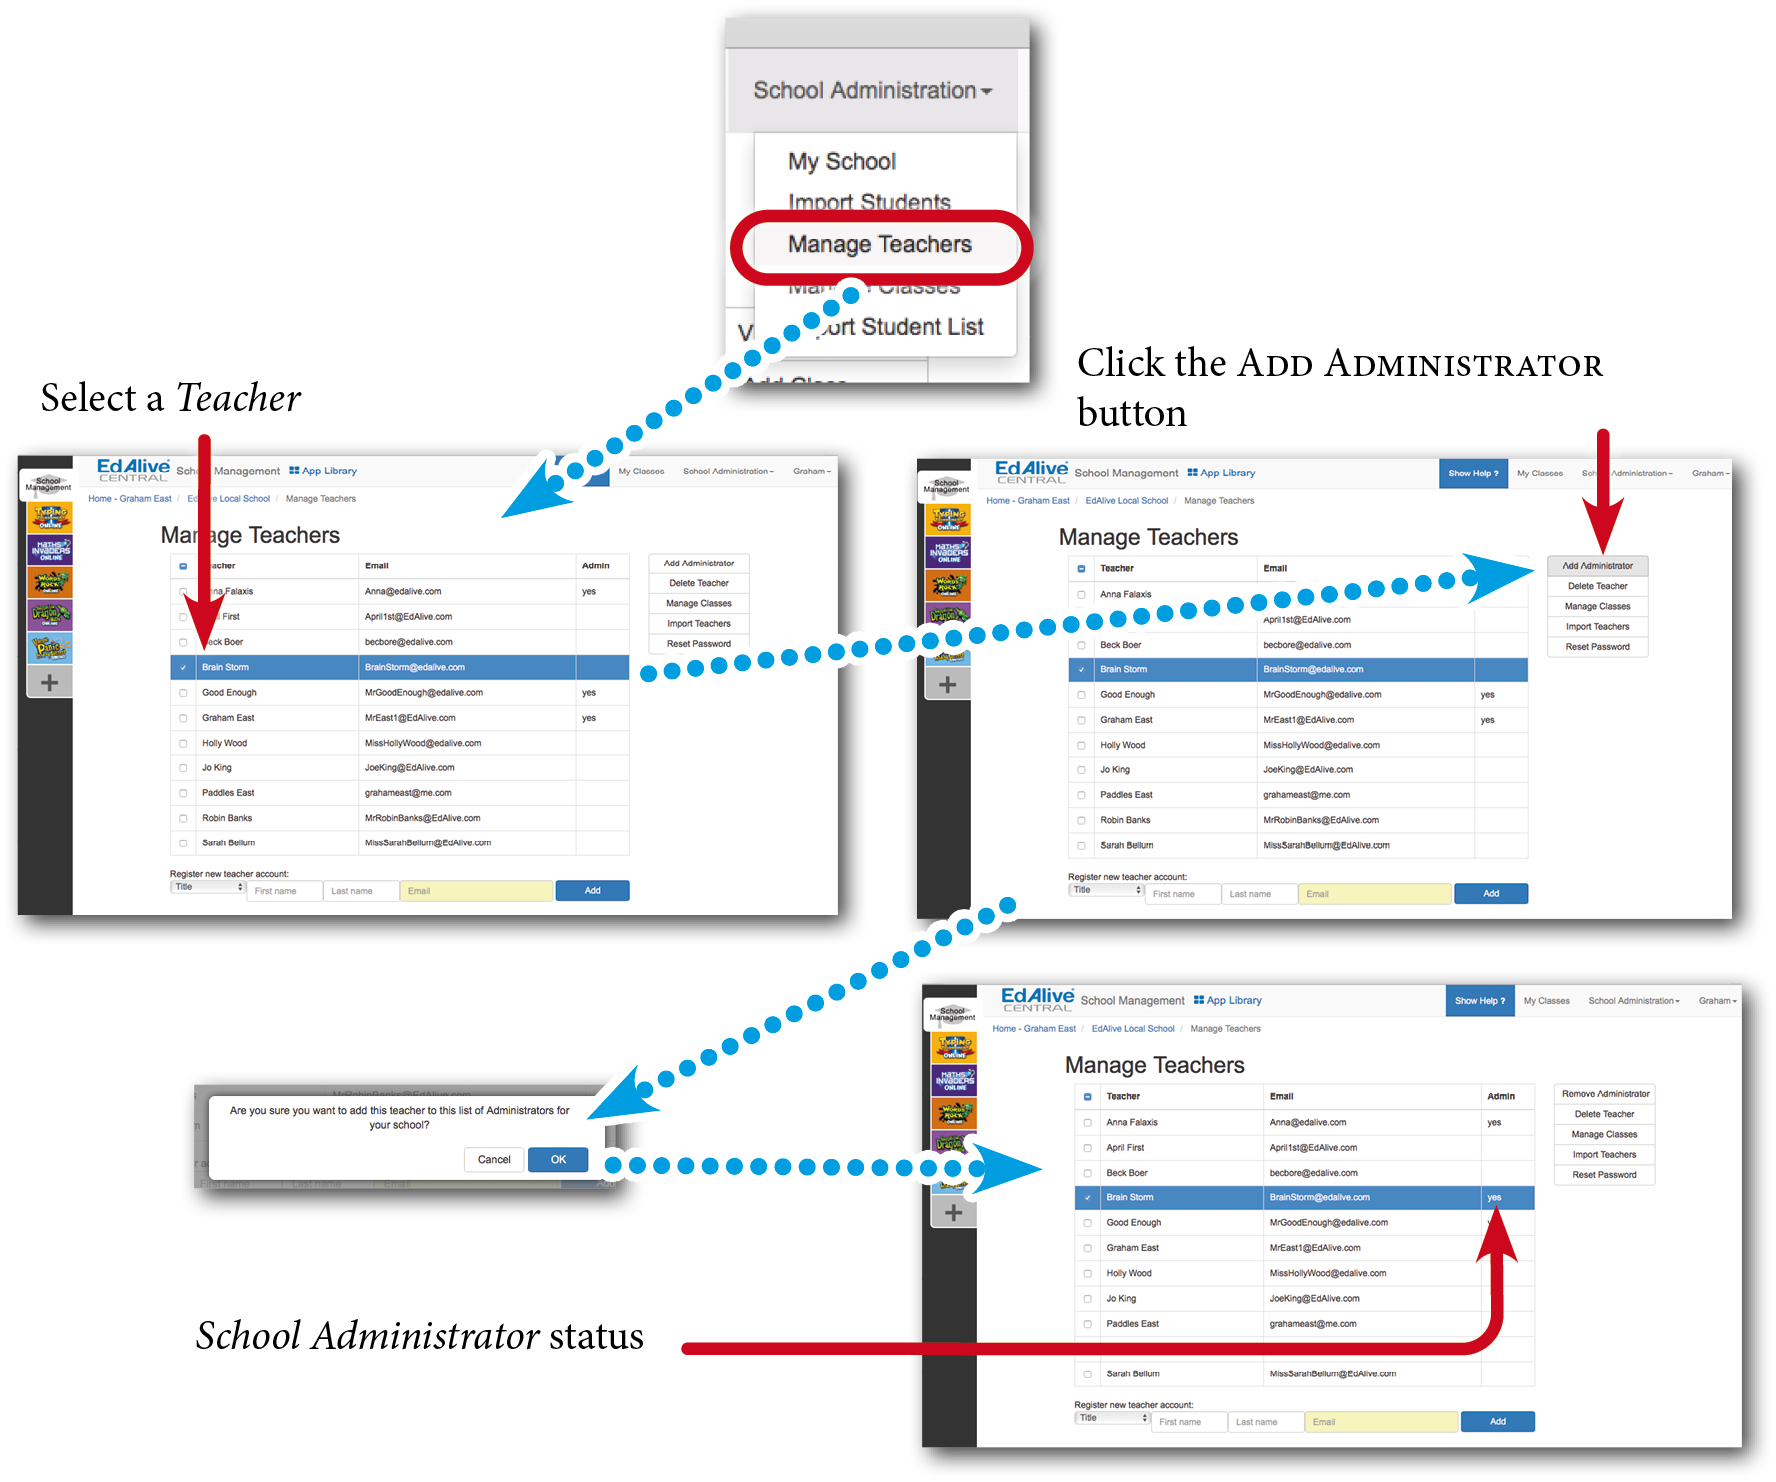
Adding and Removing School Administrators
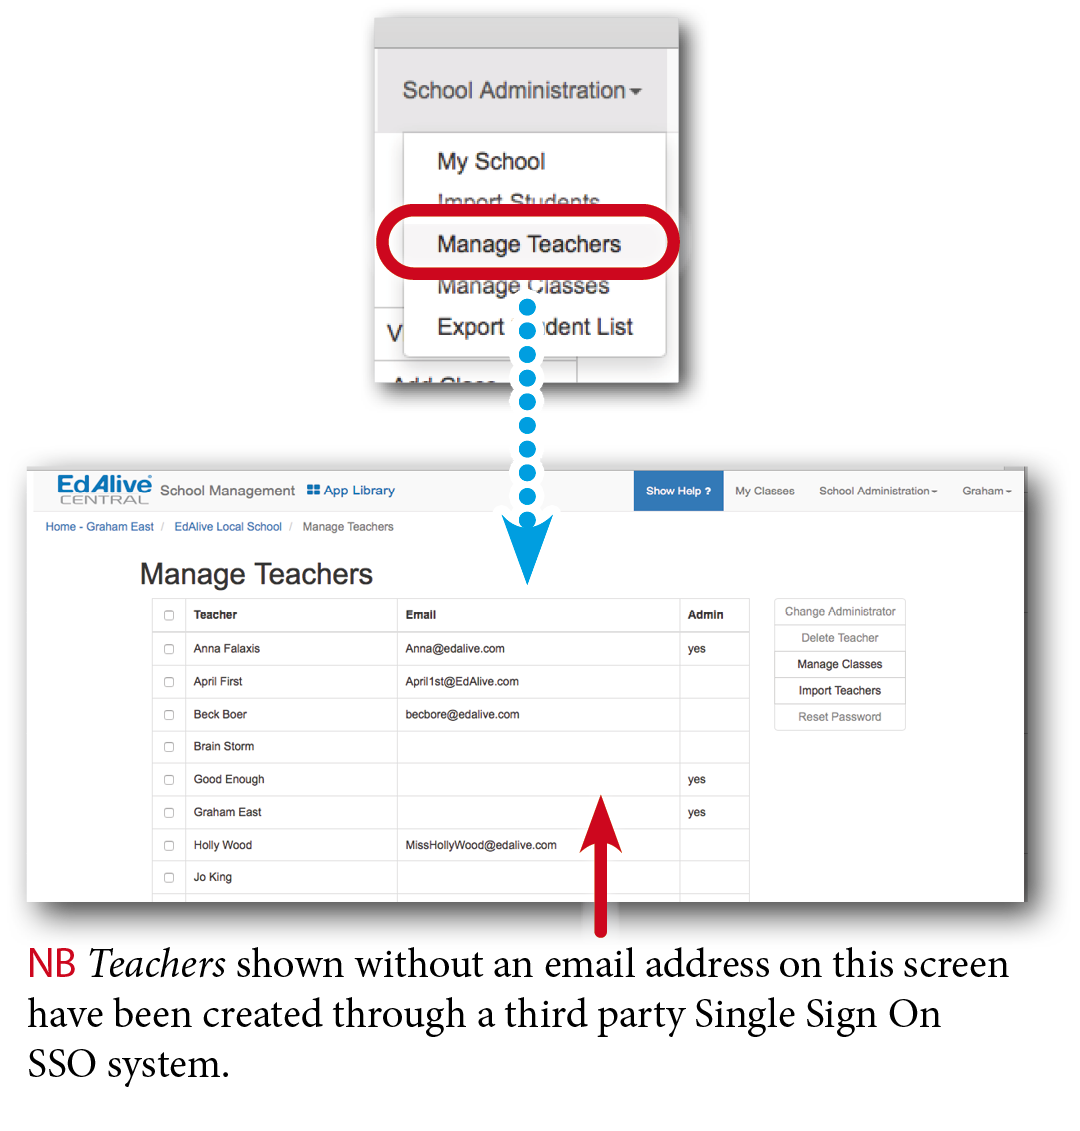
To add a School Administrator choose Manage Teachers from the School Administration menu.
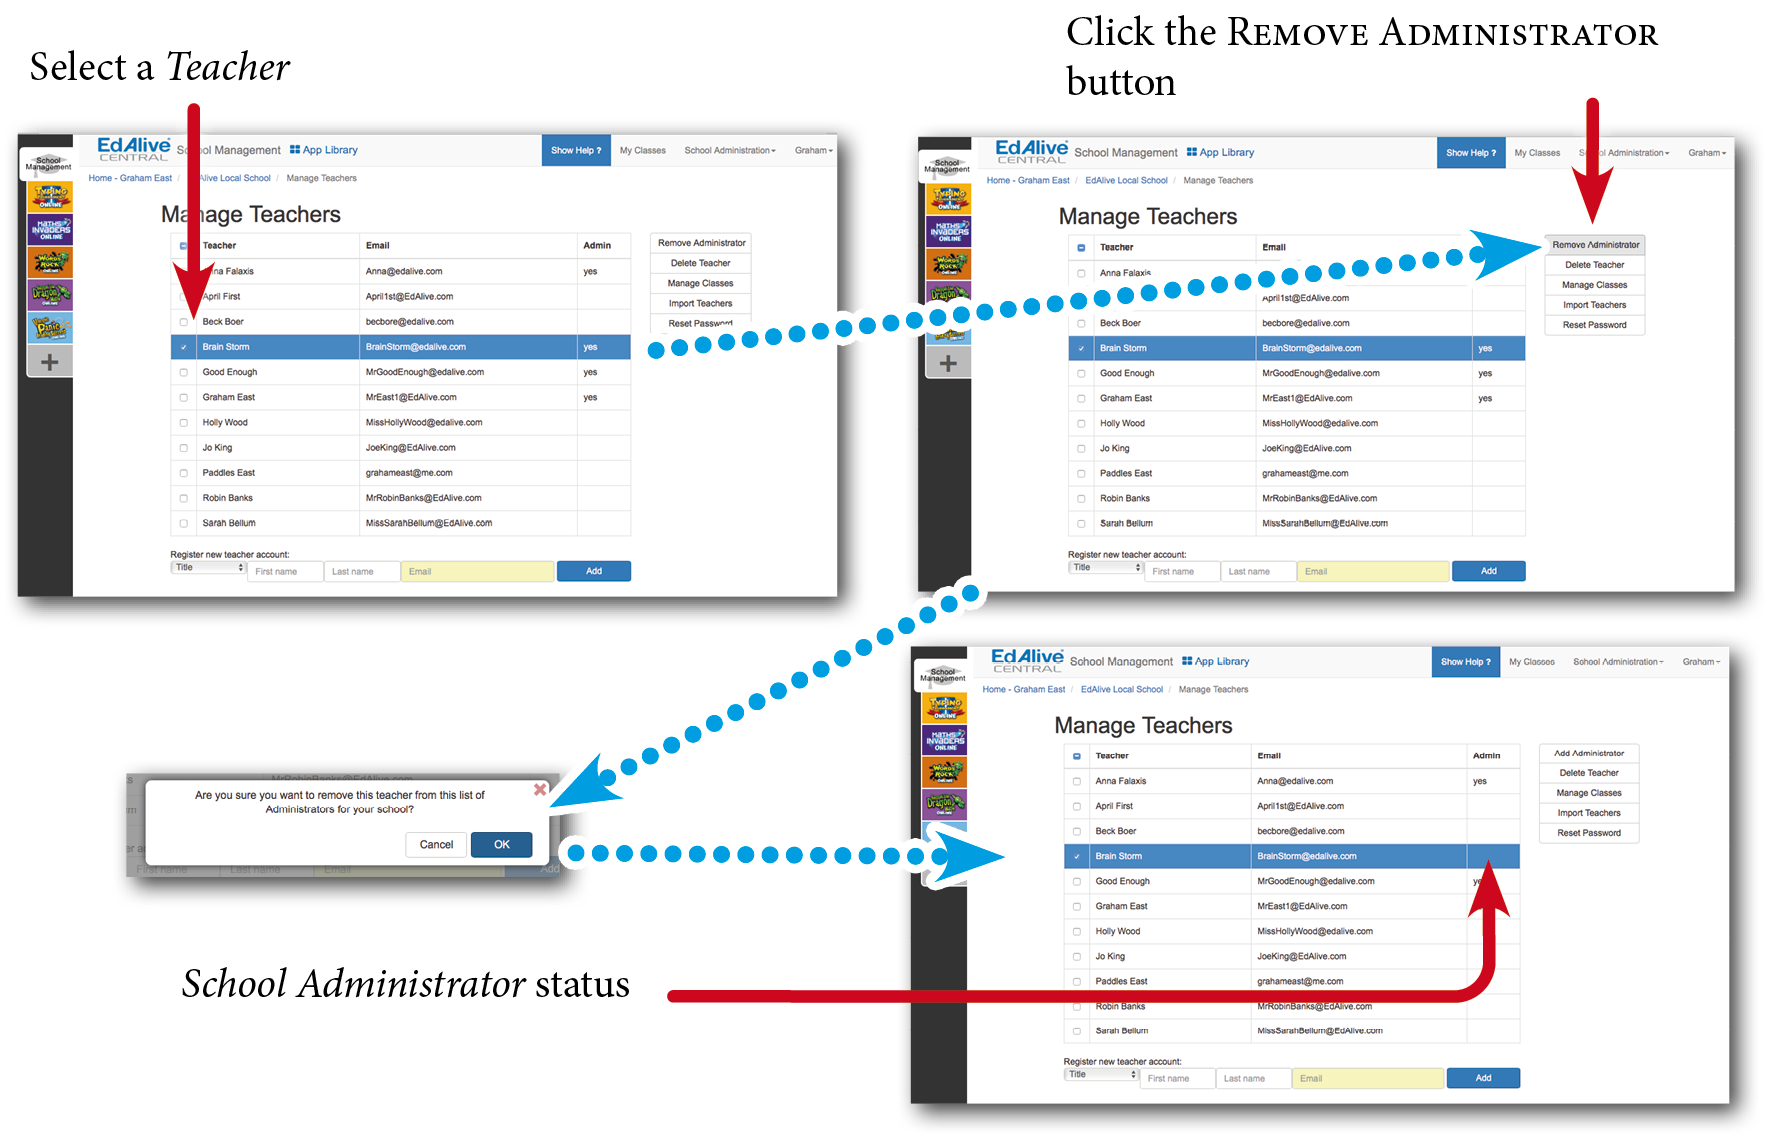
To remove a School Administrator choose Manage Teachers from the School Administration menu then:
My School - Edit School (School Administrator)
Choose My School from the School Administration menu.
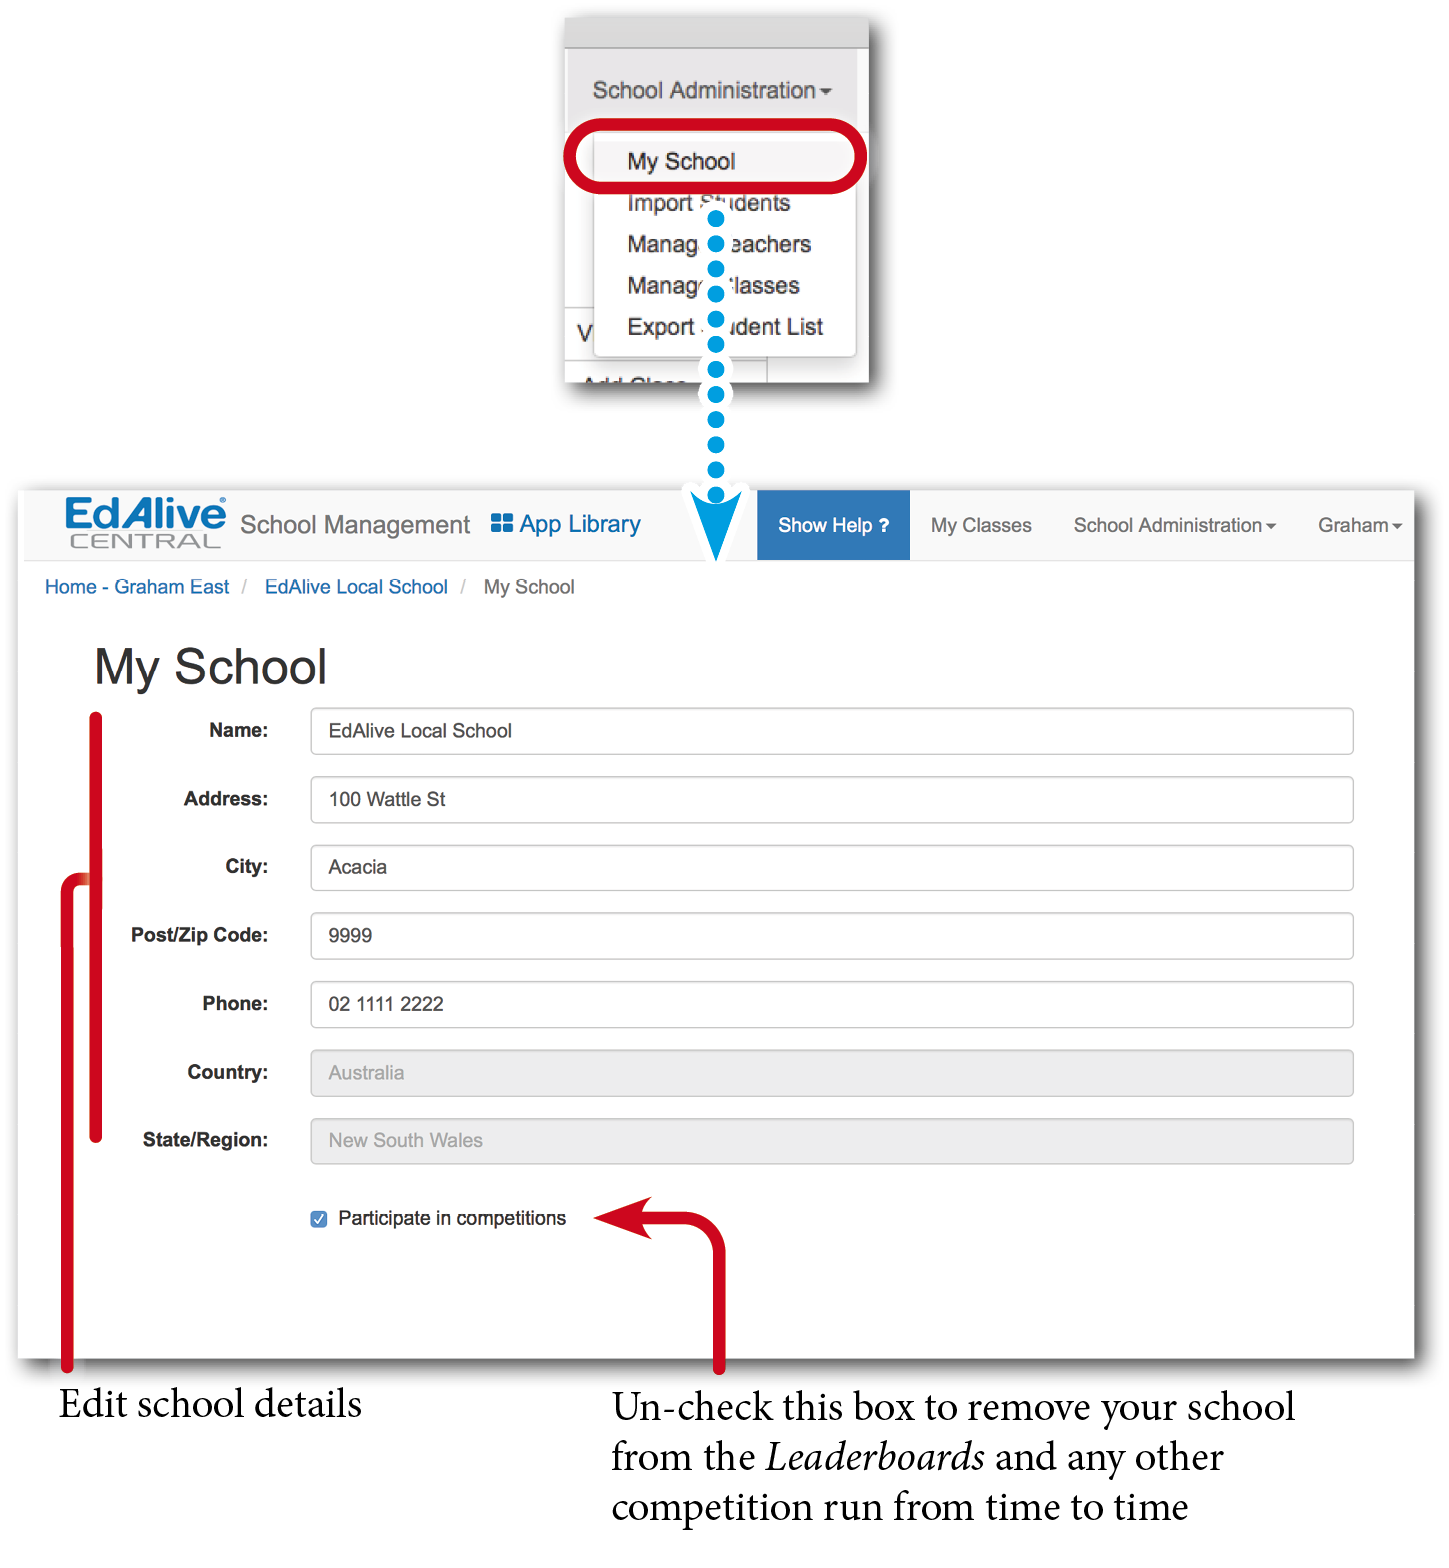
Withdraw your School from the Leaderboard
A School Administrator can withdraw a School from the Leaderboards or any other competitions that are organised by EdAlive. Withdrawing from competitions will be universally applied to all subscribed EdAlive Web Apps.
Manage Teachers (School Administrator)
Choose Manage Teachers from the School Administration menu at the top of your screen.
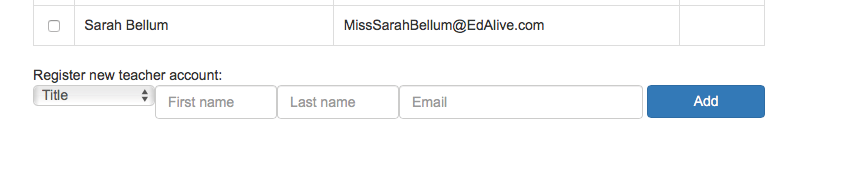
Create a new Teacher
- Enter the new Teacher’s details in the Register a New Teacher Account section at the bottom of the Manage Teachers screen.
- Once created, their password will be emailed to them. Ensure that they check their email including their spam folder to locate their password.
- They will need to use the allocated password to login. Once they have logged in we suggest that they set their own password by selecting My Account from the Name Menu, filling all the fields and clicking Save.
“Username has been taken” message
If you are seeing the message: Username has been taken it is likely that there is an existing EdAlive Central account with the same email address. This could arise for a number of reasons:
- An account with this email address was created at a previous School - The remedy is for you to contact us and we will move your account to your new school.
- You have used this email address to create a Home Account - The remedy is for you to contact us and we will update your account.
- You have forgotten that you have an EdAlive Central Account - The remedy is for you to use the Reset Password option and enter your email address as the Username.
Delete Teacher
Permanently deletes a Teacher from the School. Select the Teacher and click the Delete Teacher button.
Import Teachers
Imports a list of Teachers from a CSV file.
The system will automatically create new Teachers and send them an email indicating their password. Ensure that Teachers check their email including their spam folder to locate their password.
Reset (Teacher’s) Password
Resets a Teacher’s password and emails a password reset confirmation to them. Ensure that Teachers check their email including their spam folder to locate their password reset email. For instructions on resetting passwords refer to the Reset Password section in this guide.
Manage Classes (School Administrator)
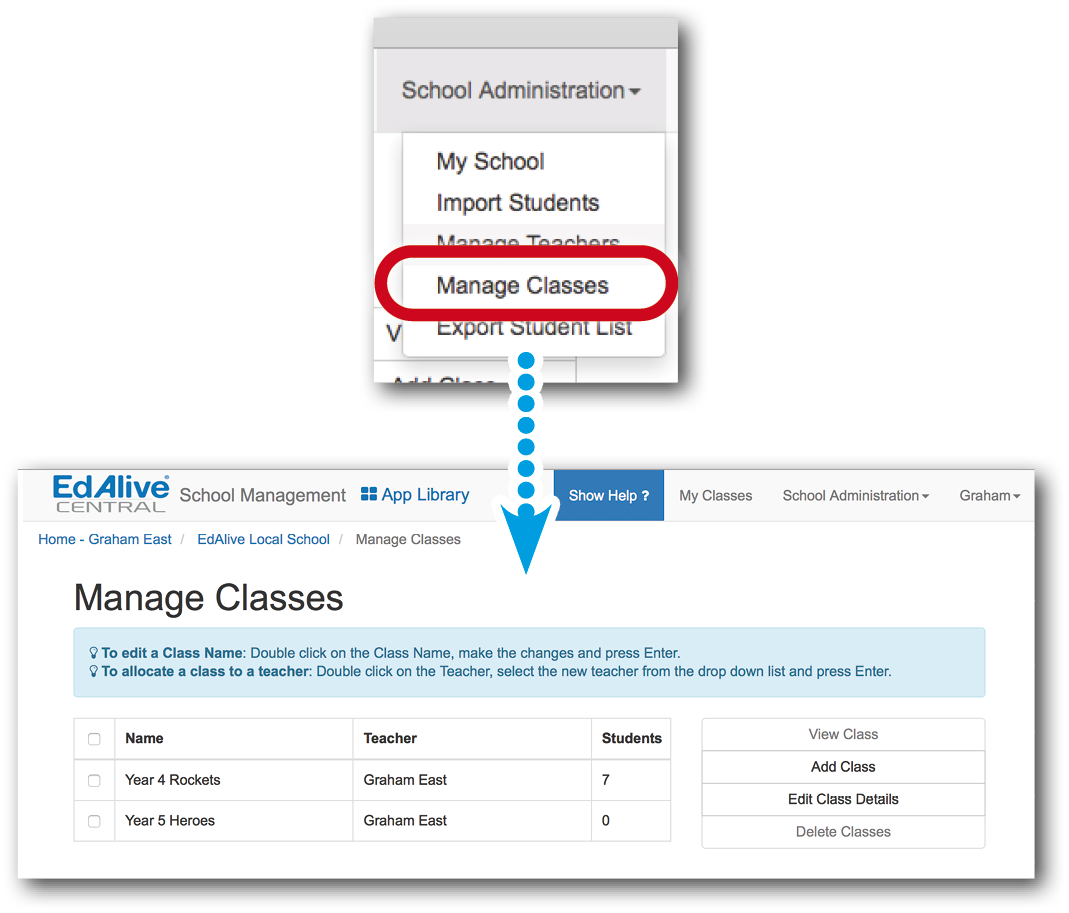
Choose Manage Classes from the School Administration menu at the top of your screen.
All of the “My Class” functions
School Administrators may perform any of the My Classes functions available to Teachers. Additionally School Administrators can perform a range of Class related functions.
Typically these additional functions touch on matters of student privacy and the security of Student and Teacher data. It is the responsibility of the school to ensure that care is taken to accord with the school policy with regard to these issues.
View Class
- Go to School Administration - Manage Classes screen.
- Select the Class and then click on the View Class button.
As a School Administrator you can view all of the Classes in the School together with the reports for each Student.
Add Class
- Go to School Administration - Manage Classes screen.
- Click the Add Class button.
- In the New Class dialogue enter the name of the Class, assign the appropriate Teachers and then select the Year Level.
- Click OK.
Edit Class details
- Go to School Administration - Manage Classes screen.
- Select a Class from the list and then click the Edit Class Details button.
- Modify the Class details as required and click the OK button
Delete Classes
- Go to School Administration - Manage Classes screen.
- Select the Classes you wish to delete from the list and then click the Delete Classes button.
Deleting a Class will not delete the Student Accounts of students in the Class and they will remain in any other Classes they are currently in. If a Student ends up in no Class at all an Administrator will be able to recover the Student from the Students in No Class class and then add them to a Class. For more information see the Students in no Class entry.
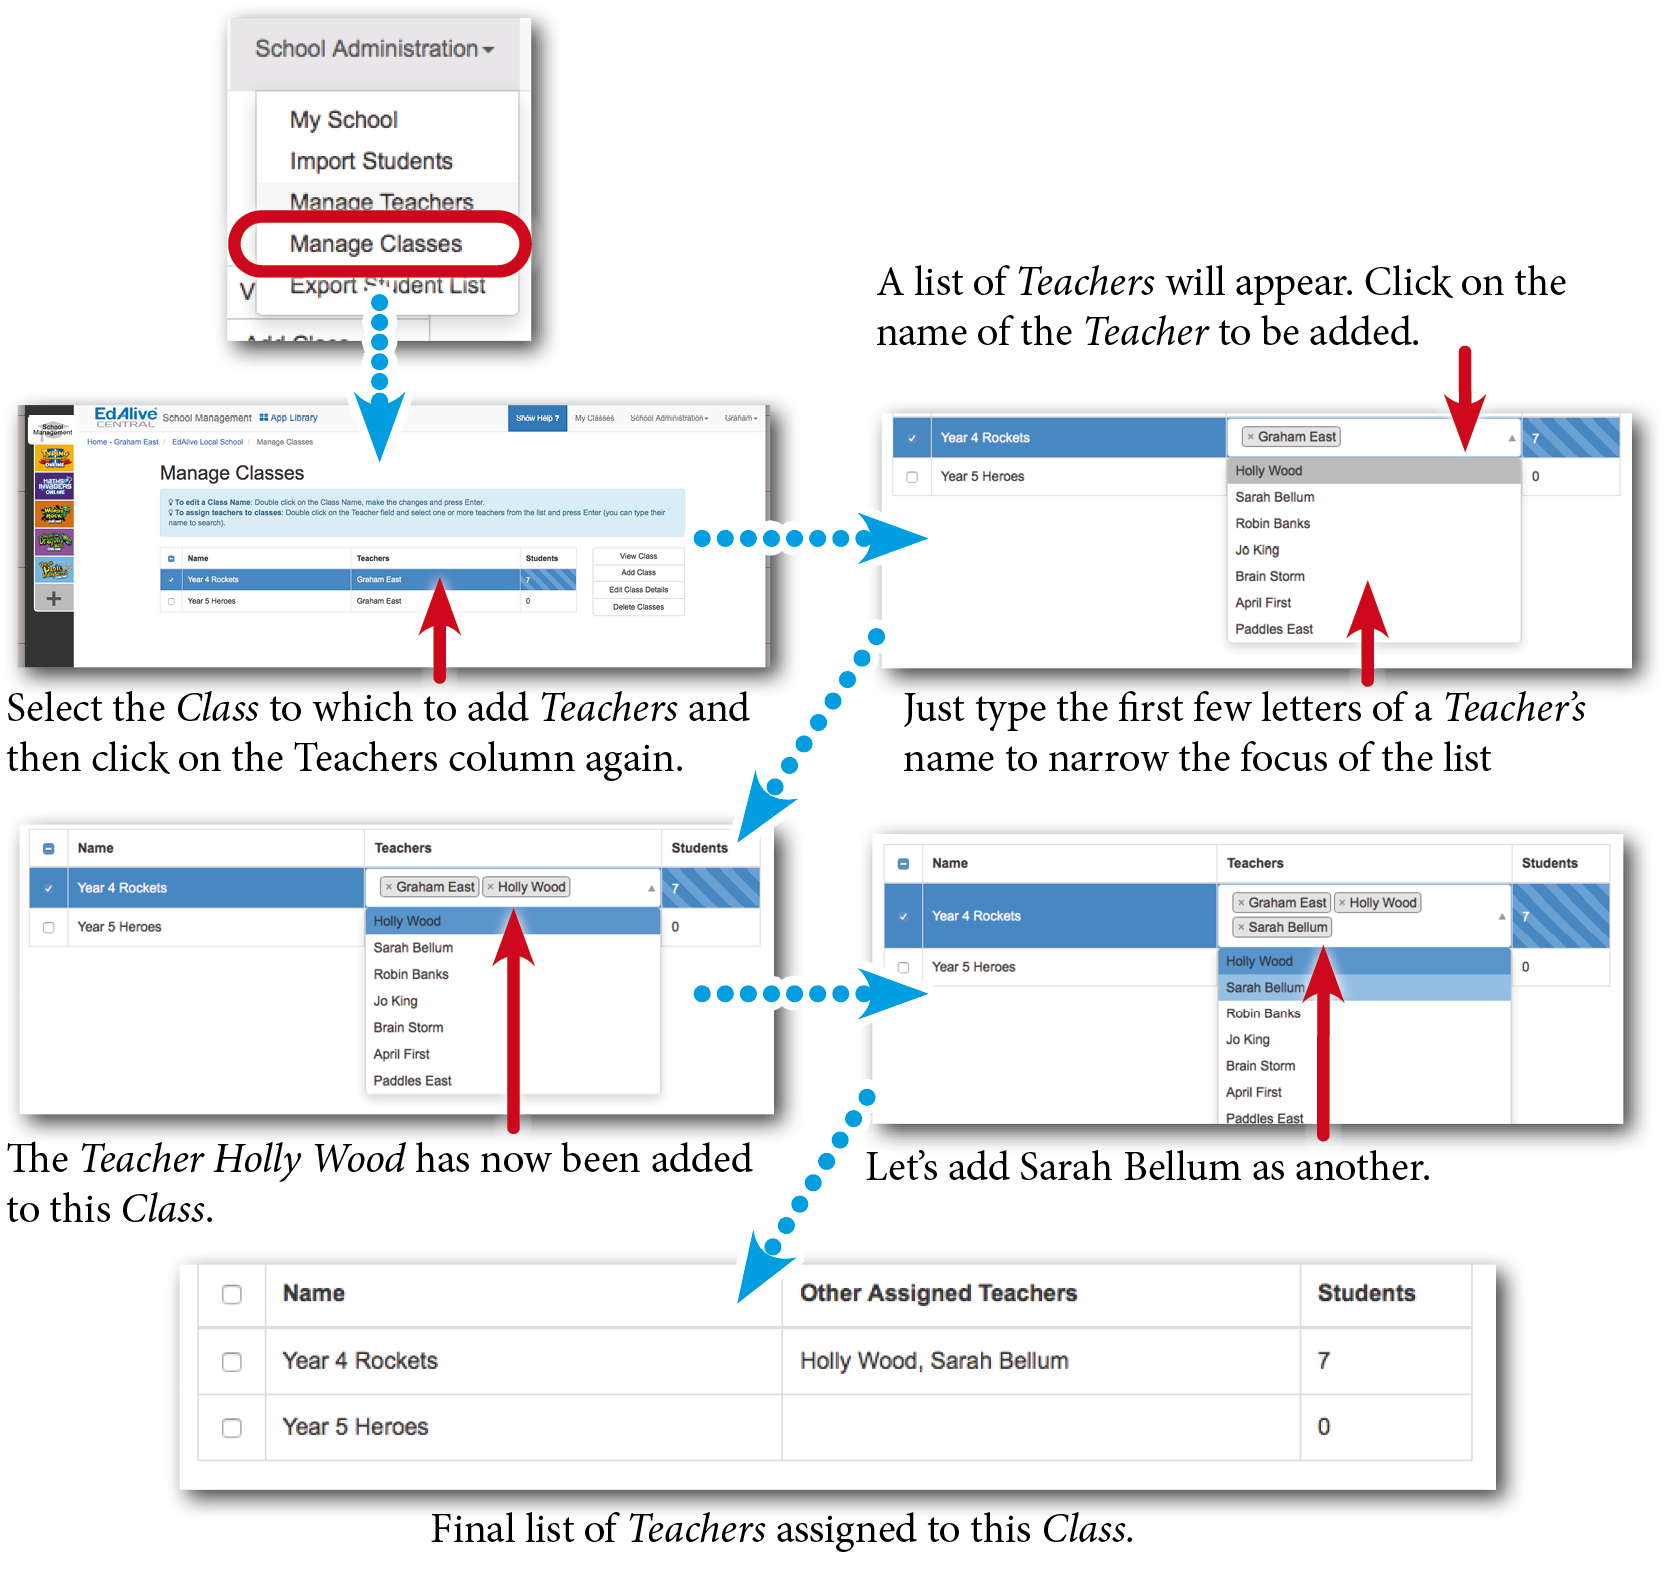
Adding multiple Teachers to a Class
There is no limit to the number of Teachers who can be assigned to a Class. The function of assigning and removing Teachers from a Class can only be performed by a School Administrator.
Once added to a Class all Teachers have the same privileges (can do the same things) as the other Teachers assigned to the Class.
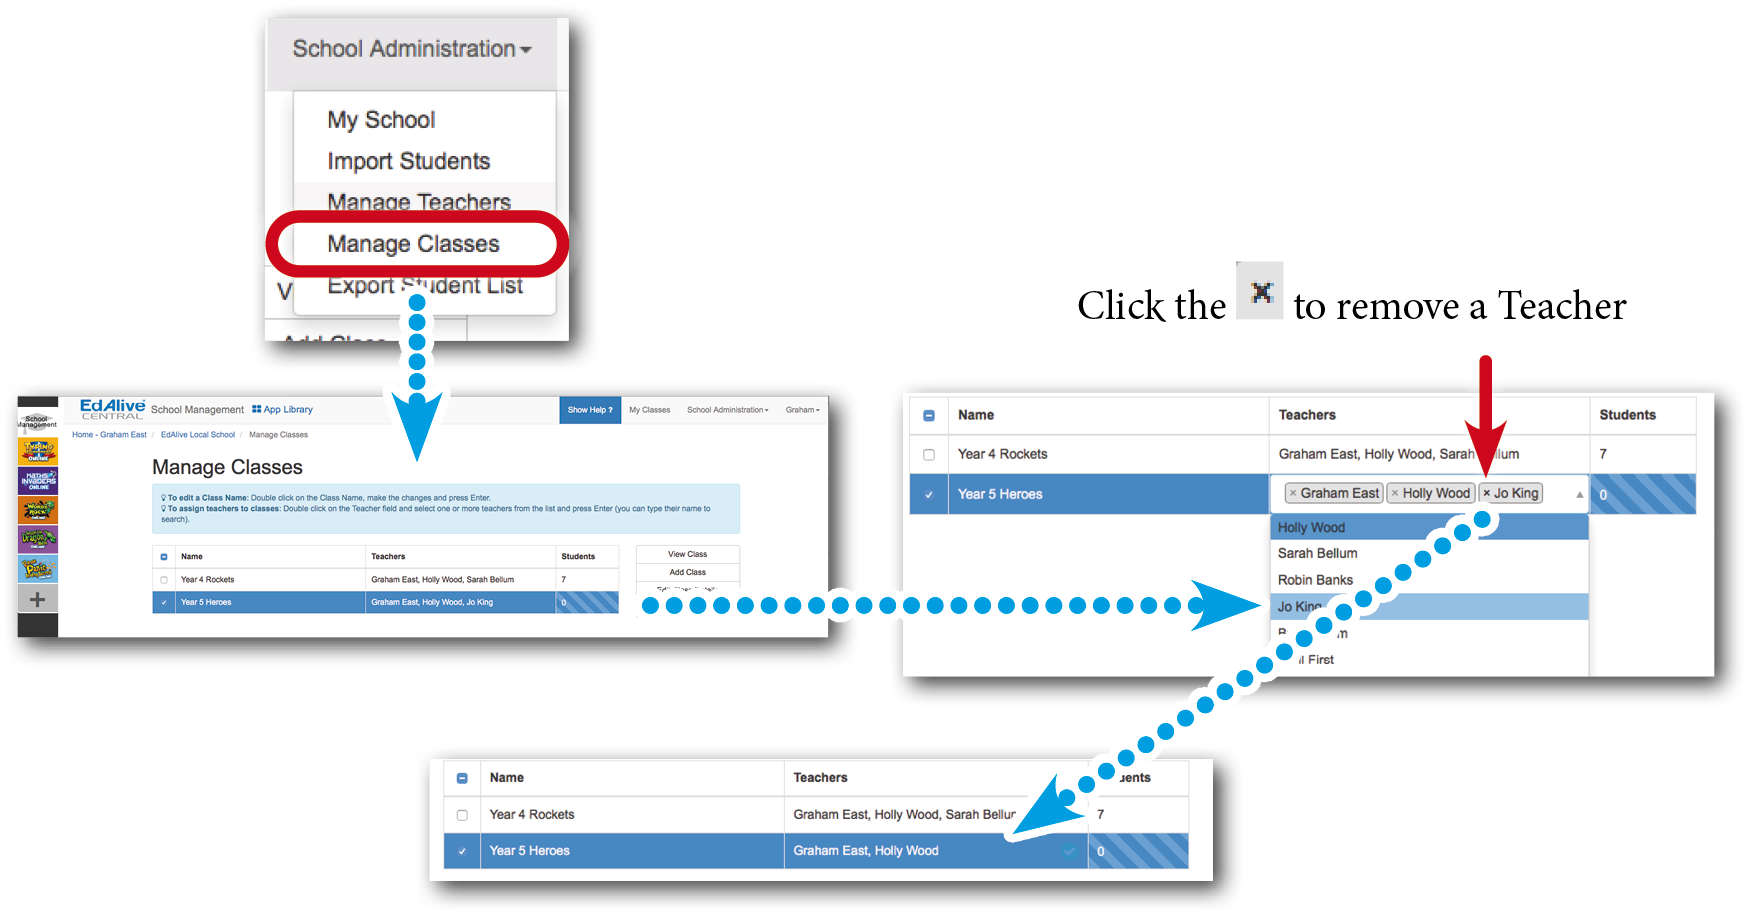
To add a Teacher to a Class
To remove a Teacher from a Class
SMART Tool
The SMART Tool gives Teachers and School Administrators a quick and powerful way to manage Student and Class Accounts in a School. It uses imported data that has been exported from a school management system or from EdAlive Central itself.
The SMART Tool can:
- Create EdAlive Central Student Accounts in preparation for their first use.
- Update existing Student details.
- Create Classes and sort Students into Classes.
- Change the passwords for groups of EdAlive Central Student Accounts.
- Identify duplicate EdAlive Central Student Accounts and merge them.
For full details about the SMART Tool and it’s capabilities see the separate entry.
Export Student List
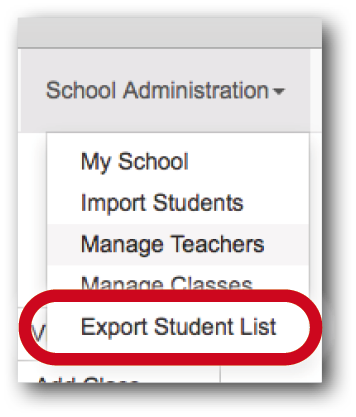
Exports a CSV file of all Students in all Classes in the School. The export is saved to the default folder on your computer. Some browsers may prompt for a location to which to save the CSV file.
Add/Move Students (School Administrator)
In addition to the Add/Move options available in the Teacher version of the Add/Move dialogue, School Administrators have access to powerful tools to aid in the management of Students and Classes within the School.
To access the School Administrator - Add/Move Students capability select a Class from the Manage Classes screen.
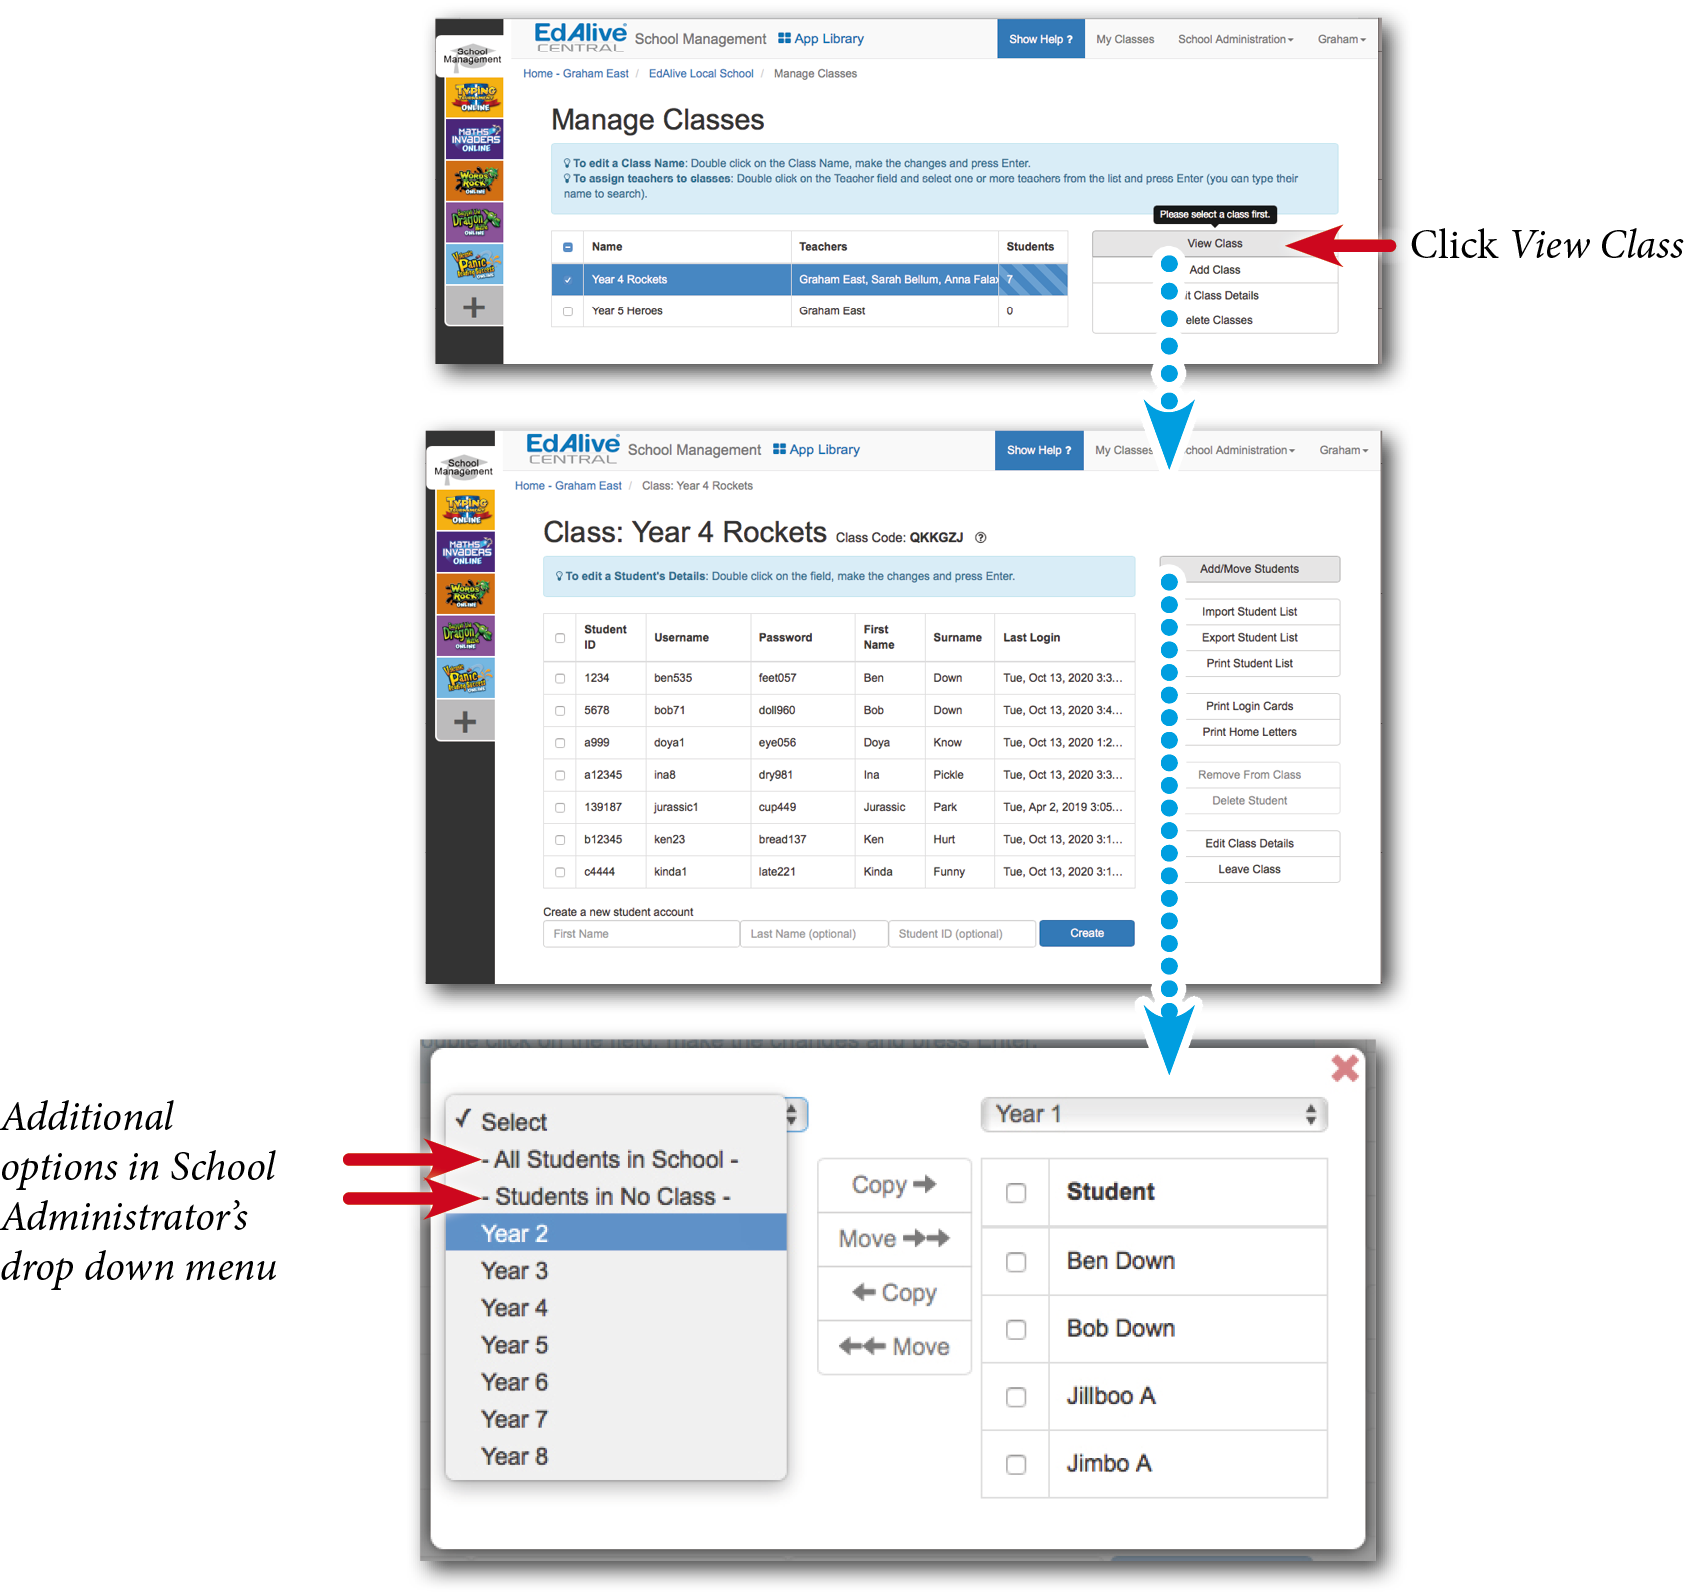
All Students in the School
Displays all of the Students in the School and allows their allocation to any Class.
Students in no Class
If a Student is removed from a Class without placing them in another Class they will appear in the class row entitled Students in No Class. To view Students in No Class select the row and click on the View Class button. From here they can be allocated to Classes by selecting them and clicking on the Add/Move button.
NB It is best practice is to delete Students if they are no longer at the school or required.
Related Articles
EdAlive Central (Schools) - Student IDs
Why you should use Student IDs Student IDs work within EdAlive Central to uniquely identify Students so that the import features may be used. The EdAlive Central system will work without Student IDs however they are designed to automate many ...Performing an End of Year School Rollover
Annual rollover At the end of each school year, you will need to perform a Rollover of the Students to the new Classes and Teachers for the new year, add new enrolments and remove Students who have left the school. EdAlive Central makes this process ...EdAlive Central (Schools) - The EdAlive Central Suite of Web Apps
EdAlive Central - One app to unite them all EdAlive Central (central.edalive.com) is the ground-breaking system that unites all the EdAlive Web Apps into one seamless whole. It manages all functions relating to Schools including: Students and their ...EdAlive Central (Schools) - System Requirements
Any device, anywhere, anytime All EdAlive Central Web Apps work on any device including Windows PCs, Apple Macs, Surface Tablets, iPads, Chromebooks and other Android tablets. Unlimited Access 24/7 wherever there is an Internet connection. No need ...EdAlive Central (Schools) - Whitelisting
Whitelist required URLs The following URLs should be whitelisted or unblocked from your network filters and added to Internet Explorer’s Trusted Sites list (if used). For EdAlive Central: www.edalive.com help.edalive.com central.edalive.com ...
Download the PDF Guide

Download the PDF Guide
Download the PDF Guide
Download the PDF Guide
Download the PDF Guide

Download the PDF Guide

Download the PDF Guide

Download the PDF Guide