EdAlive Central (Schools) - Manage Students
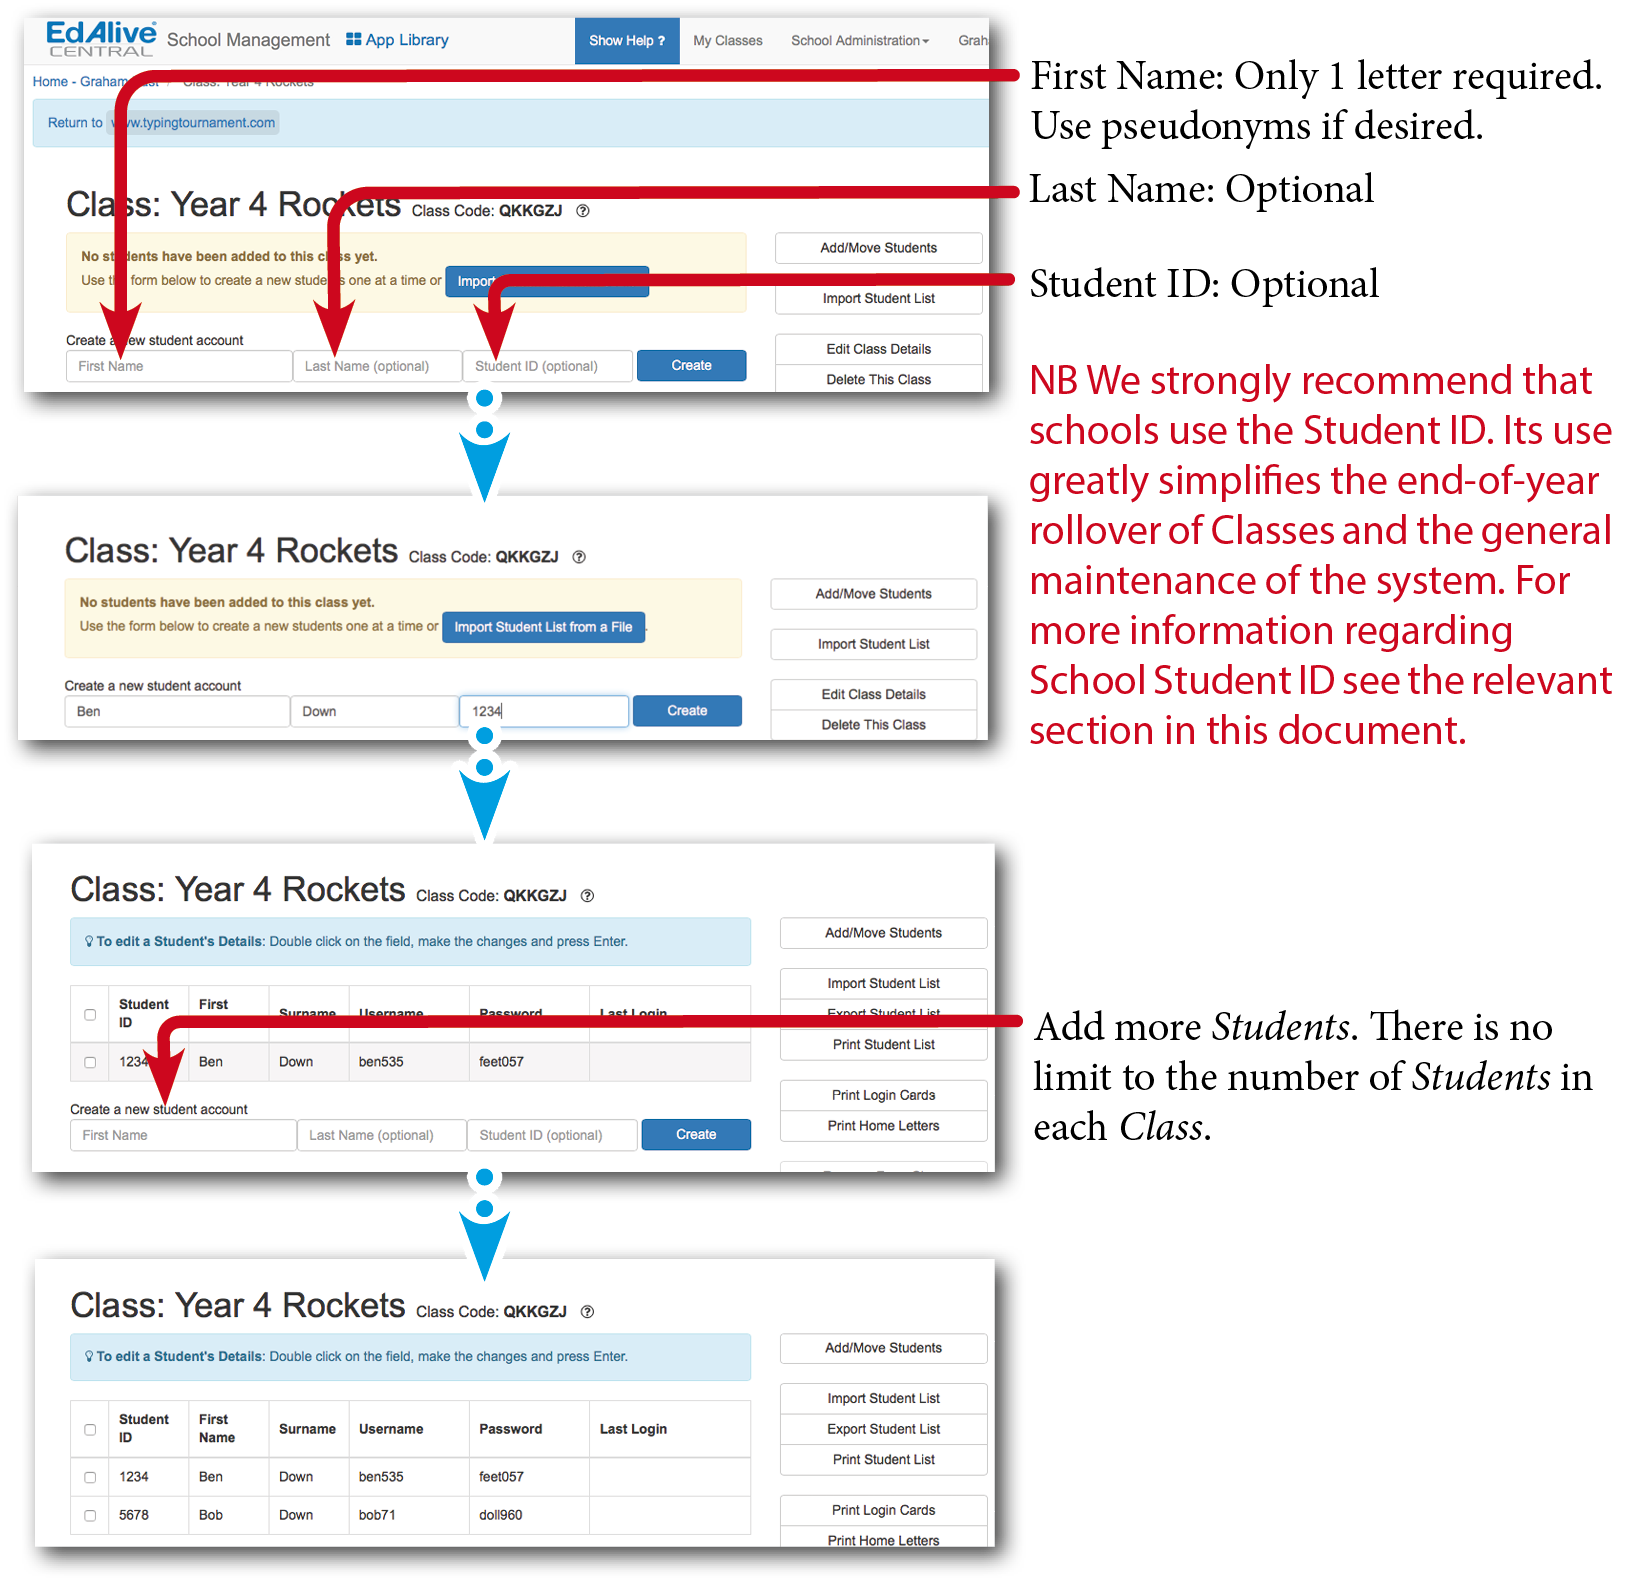
To give schools flexibility in setting up Student accounts in congruence with their student privacy policies the EdAlive Central system uses a highly flexible system with minimal required student information.
To access the Class screen choose School Management, then select My Classes from the Menu Bar, choose the Class and click the View Class button

Manually add Students to a Class
NB If possible use the Import a Whole Class option. If possible have a School Administrator use the Import a Whole School option as it is quicker and less error prone. If on the other hand you only need to create a couple of Students then use this manual process.
- Click on My Classes from the menu bar at the top of the EdAlive Central School Management screen.
- Select a Class and click the View Class button.
- Use the Create a new Student account section at the bottom to add a Student to the Class
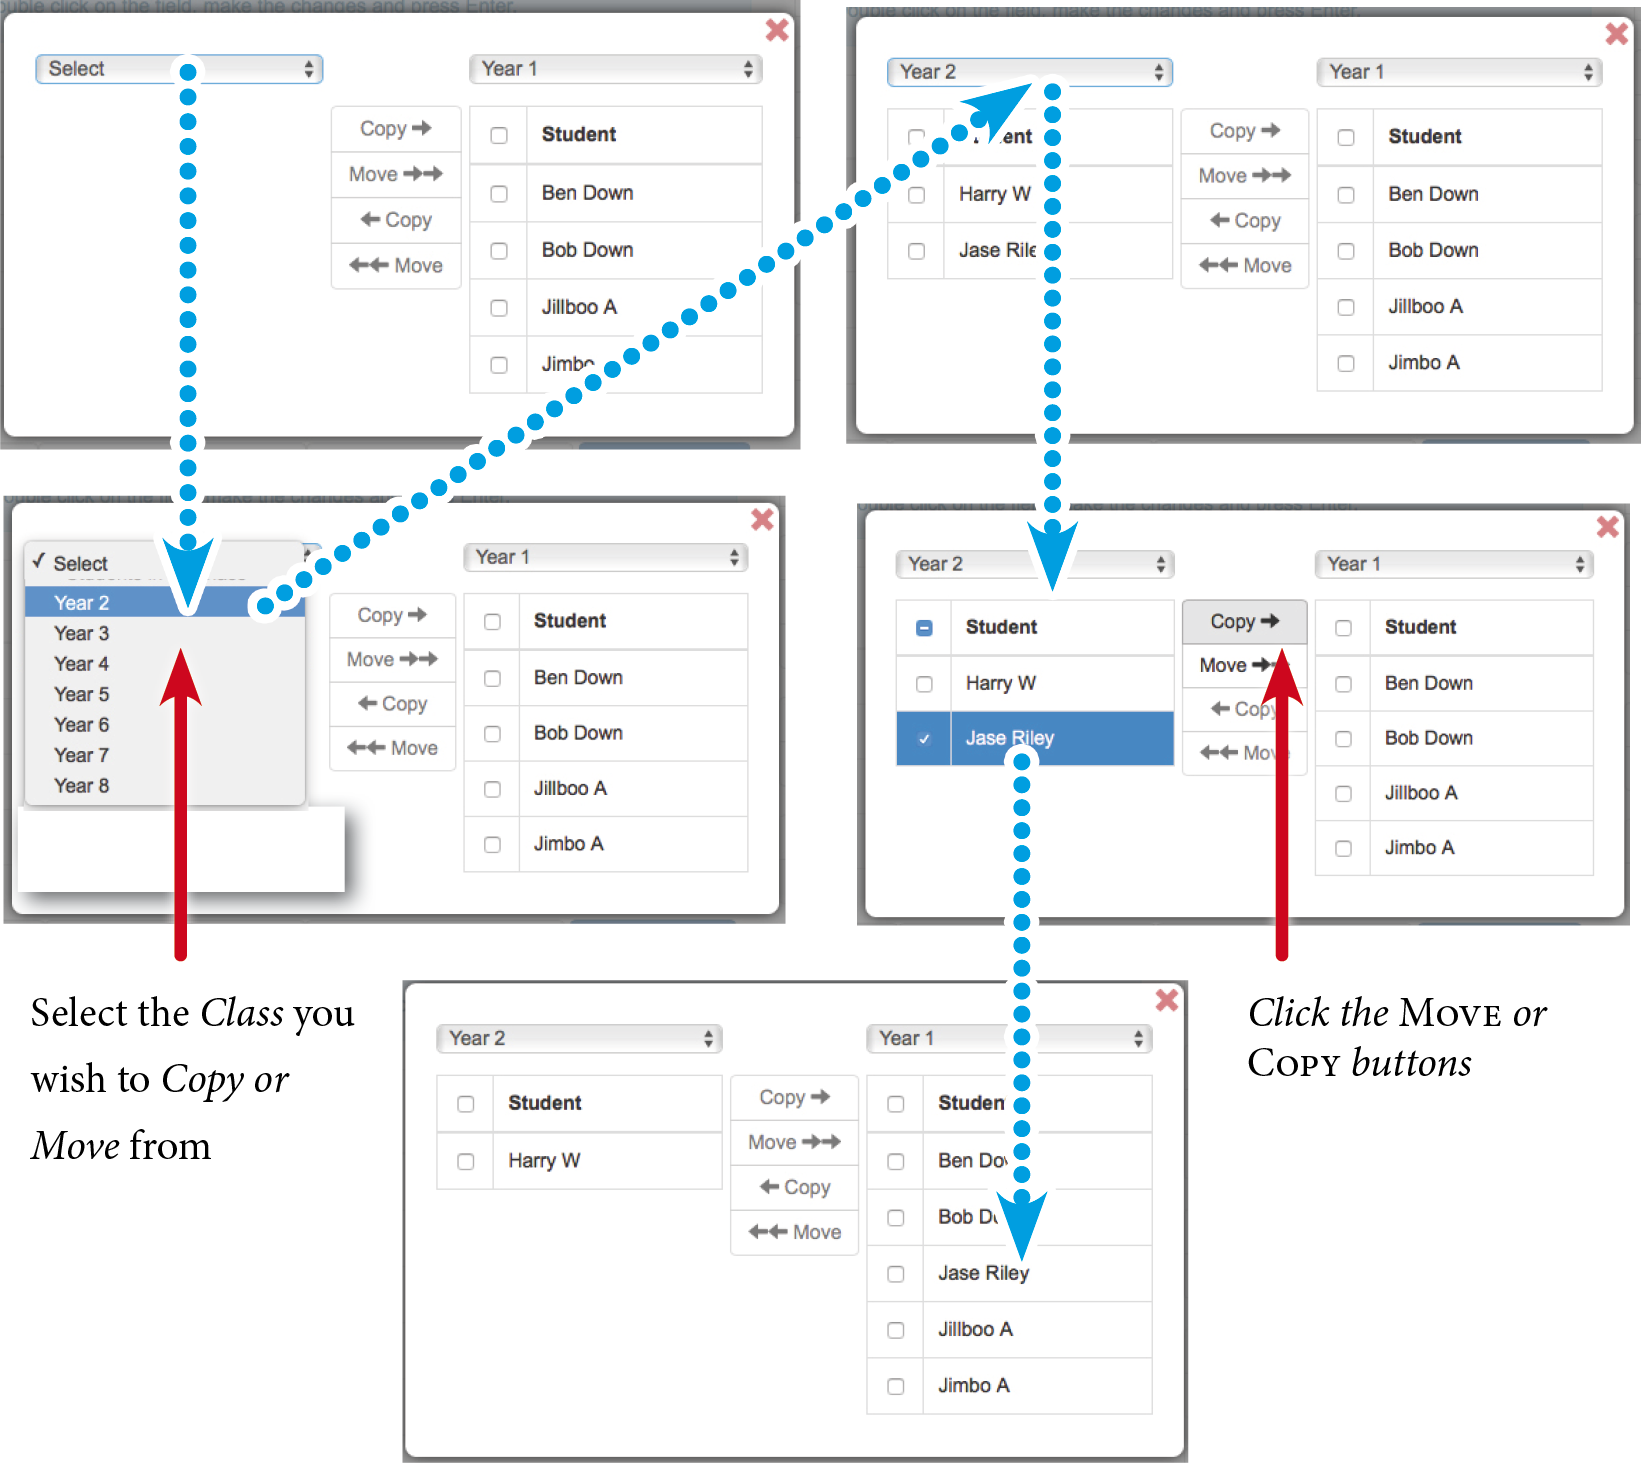
Add/Move Students
From the View Class screen you can click the Add/Move Student button.
NB Teachers may only manage Classes created by themselves or allocated to them by a School Administrator. A Teacher who has been assigned to a Class can see the names of other Teachers assigned to the Class but are unable to add or remove other Teachers from the Class.
The Add/Move Students dialogue allows Teachers to:
Move Students between Classes
- Click on the drop down menus on either side of the top of dialogue box and select the Classes to Move the Students to or from.
- Click on the appropriate Move button for the direction you wish to Move the Student.
Copy Students to other Classes
- Click on the drop down menus on either side of the top of dialogue box and select the Classes to Copy the Students to or from.
- Click on the appropriate Copy button for the direction you wish to Copy the Student.
Remove Student from Class or Delete a Student
- Removing a Student from a Class does not remove the Student from the EdAlive Central system.
- Deleting a Student from the School completely removes the Student and all their related data from the EdAlive Central system.
Working with your Classes
Using the buttons to the right of the Class screen you can:
- Export a Student list to a CSV file for external modification.
- Print a list of Students with their usernames and passwords.
- Print individual Student Login Cards.
- Print a letter for parents inviting them to use the EdAlive Web Apps that your school is subscribed to at home with their children.
Related Articles
Performing an End of Year School Rollover
Annual rollover At the end of each school year, you will need to perform a Rollover of the Students to the new Classes and Teachers for the new year, add new enrolments and remove Students who have left the school. EdAlive Central makes this process ...EdAlive Central (Schools) - The EdAlive Central Suite of Web Apps
EdAlive Central - One app to unite them all EdAlive Central (central.edalive.com) is the ground-breaking system that unites all the EdAlive Web Apps into one seamless whole. It manages all functions relating to Schools including: Students and their ...EdAlive Central (Schools) - Student IDs
Why you should use Student IDs Student IDs work within EdAlive Central to uniquely identify Students so that the import features may be used. The EdAlive Central system will work without Student IDs however they are designed to automate many ...EdAlive Central (Schools) - Whitelisting
Whitelist required URLs The following URLs should be whitelisted or unblocked from your network filters and added to Internet Explorer’s Trusted Sites list (if used). For EdAlive Central: www.edalive.com help.edalive.com central.edalive.com ...SMART Tool - Performing a School Rollover
Introduction Once a year, you will need to ‘roll over’ your Student Accounts to their new Classes, add new enrolments and remove Student Accounts of students who have left your school. Getting Started. From the School Administration menu choose SMART ...
Download the PDF Guide
Download the PDF Guide
Download the PDF Guide
Download the PDF Guide
Download the PDF Guide

Download the PDF Guide

Download the PDF Guide

Download the PDF Guide